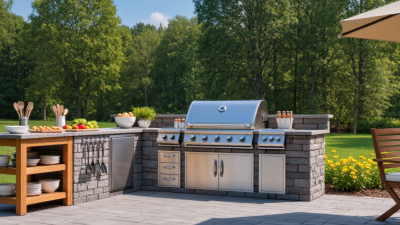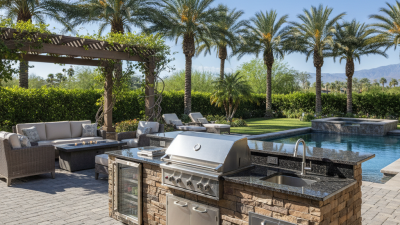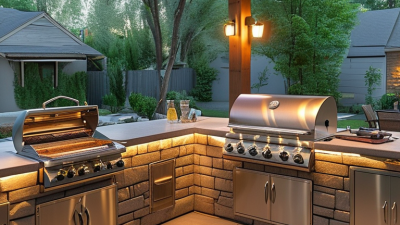

Choosing a built in bbq is about more than adding a shiny centerpiece to your outdoor kitchen. The right grill should suit your cooking habits, available space, and local conditions. Think about weeknight meals, weekend gatherings, and whether you often cook with direct heat or low, steady heat. Small details matter. A lid that opens easily can feel just as important as an extra burner.
Barbecue author and television host Steven Raichlen has said, “Barbecue is a way of life, not a way of cooking.” That idea fits an outdoor kitchen, where the grill becomes part of how people gather. Still, enthusiasm should not replace careful comparison. Check cooking-area dimensions, burner layout, fuel type, temperature controls, and the manufacturer’s installation requirements. Stainless steel can vary in grade and construction, so a polished finish alone tells you little about long-term durability.
Look closely at the space beneath the counter, too. A gas model may need specific ventilation and clearances, while a charcoal grill brings different storage and cleanup needs. Confirm measurements before ordering, and use a qualified professional when installation requires gas or electrical work. A showroom can make every grill seem perfect. It cannot show how awkward a lid feels beside a wall or how quickly grease collects after dinner. Those details deserve honest thought. The sections ahead explain how to compare features, fit, materials, and value before choosing a built in bbq that works for your outdoor kitchen—not just for the display.
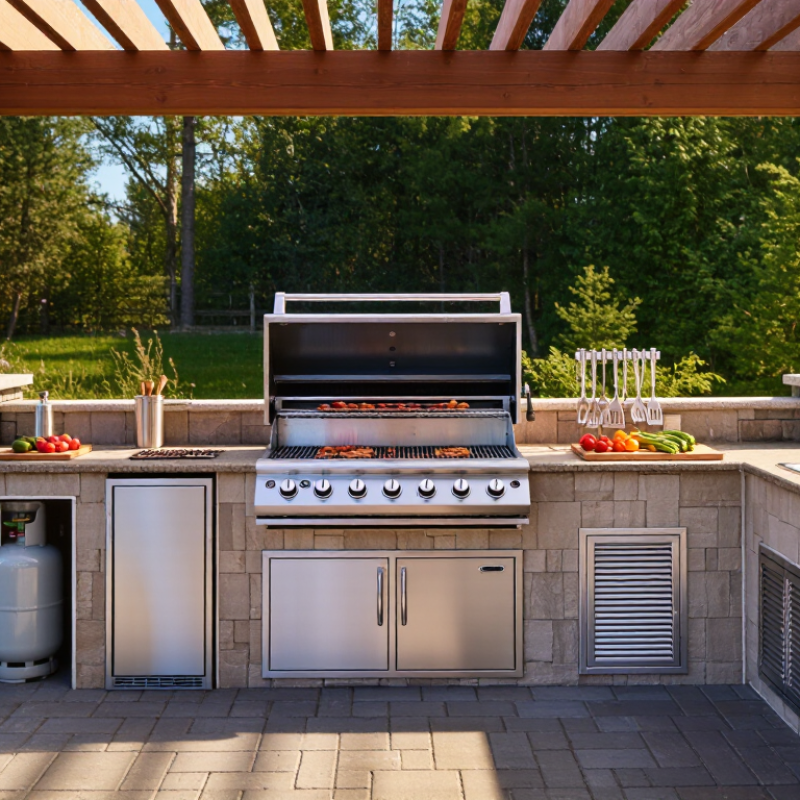
Before choosing a built-in BBQ, write down what you actually cook and how often you entertain. If most meals are quick weeknight dinners, a compact cooking surface may be more useful than a large grill with features you rarely use. For steaks, fish, and vegetables cooked together, consider burner arrangement and whether different heat zones would help. A wide grill can look impressive, but it also uses valuable counter space. Small details matter.
Sketch your outdoor kitchen to scale, including the grill, sink, refrigerator, doors, and nearby walls. Leave practical landing space beside the cooking area for a tray, raw ingredients, and hot food. Check the installation instructions for required clearances and ventilation; these vary by unit and fuel type. Have gas or electrical connections assessed by a qualified installer before finalizing the layout. Measure twice. It saves trouble.
Think through the cooking path: can you reach utensils without crossing a serving area, and can guests pass without crowding the grill? Keep the cook’s workspace separate from the main seating route when possible. A plan can still miss something—like where grease cleanup supplies will live—so test it by imagining one busy meal from prep to serving. The perfect layout on paper may feel awkward in use. A little revision is normal.
Choosing fuel comes down to your cooking habits and outdoor setup. Natural gas connects to a fixed supply, so you avoid changing cylinders during a meal. Propane works well where a gas line is unavailable, but the tank needs a secure, ventilated storage space. Charcoal adds smoky flavor and suits slower cooking, though it takes longer to heat and needs ash cleanup. That convenience has a catch: fuel access and maintenance matter as much as flavor.
Built-in grill designs vary in cooking area, lid shape, and added features. A compact single-lid unit can fit a narrow counter and handle everyday meals. Larger designs may offer separate heat zones, useful when vegetables need gentler heat than steaks. Side burners can help with sauces, but they take up counter space. Check the cutout dimensions, ventilation requirements, and required clearances before choosing a grill head. A layout can look generous on paper, then feel cramped when the lid opens.
Tips: Measure the counter opening twice, including depth. Compare fuel costs and availability where you live. Ask a qualified installer to confirm gas connections and ventilation. Keep a little landing space beside the grill; hot trays need somewhere to go.
A built-in grill should fit the cooking you actually do, not just the space in a catalog photo. Compare cooking area with the number of people you usually serve, then check the unit’s full exterior dimensions. Allow room for the lid to open without striking a wall, shelf, or pergola beam. Measure twice. A narrow countertop can make even a well-sized grill awkward to use.
Before cutting the counter, confirm the required opening dimensions in the installation guide. The cutout is not always the same size as the grill body. Check countertop thickness, support needs, and access to fuel and electrical connections. Leave practical room for doors or drawers below; a shutoff valve should not end up blocked behind stored pans. Even a careful plan can miss a small obstruction, so mark the opening and test the layout with cardboard first.
Ventilation matters, especially in enclosed islands. Follow the grill’s specified vent locations and opening sizes, and do not assume cabinet doors provide enough airflow. Requirements can differ by fuel type and installation, so have a qualified installer review the plan and applicable local requirements. Keep combustible materials at the clearances stated in the guide. It is easy to focus on the shiny cooking surface and overlook the air paths behind it. I would check those twice.
| Planning dimension | What to check | Practical guidance | Before installation |
|---|---|---|---|
| Cooking capacity | Estimate how many people you usually cook for and how much food you prepare at once. | Compact grills suit smaller meals; wider grills provide more room for multiple dishes and indirect cooking. Nominal grill width alone does not indicate usable cooking area. | Compare the listed primary cooking area and overall dimensions for each specific model. |
| Grill and cutout dimensions | Measure the appliance’s overall width, depth, and height, then compare them with the required countertop cutout dimensions. | The cutout is not necessarily the same size as the grill. Required dimensions differ among models, even when their nominal widths are similar. | Use the installation template or specification sheet for the exact model; do not size the opening from nominal grill width. |
| Countertop and support | Check countertop thickness, opening placement, support structure, and the appliance’s installed weight. | The grill must sit on a stable, appropriately supported surface. Some designs require a particular mounting flange or support arrangement. | Confirm countertop and cabinet requirements in the appliance instructions before cutting or building the island. |
| Clearances to nearby surfaces | Review required spacing from combustible walls, overhead structures, and adjacent cabinets. | Clearance requirements depend on the appliance and surrounding materials. A noncombustible finish does not automatically remove the need for specified clearances. | Follow the model’s installation manual and applicable local requirements; do not rely on a generic clearance value. |
| Enclosure ventilation | Determine whether the grill uses natural gas or propane and whether the island has enclosed storage spaces. | Gas can accumulate in an inadequately ventilated enclosure. Required vent locations, openings, and free area are product- and code-dependent. | Install the ventilation specified by the manufacturer and local code. Do not block required openings with doors, drawers, or stored items. |
| Fuel supply and connections | Confirm fuel type, connection location, gas-line sizing, shutoff access, and whether a conversion kit is approved. | Natural gas and propane are not interchangeable unless the appliance is specifically configured and approved for the fuel in use. | Have gas work completed and leak-tested by a qualified professional in accordance with local regulations. |
| Outdoor exposure | Consider rain, coastal air, wind, and whether the cooking area is covered. | Outdoor-rated construction and suitable protection can help limit weather-related wear. Covers should be used only as directed and when the grill is cool. | Check care instructions and keep the grill’s required ventilation and clearances unobstructed. |
| Service and access | Plan access to the fuel shutoff, electrical connections if applicable, and components that require maintenance. | A tight fit can make inspection, cleaning, or repairs difficult, even if the grill fits the countertop opening. | Allow the service access specified in the manual and make sure shutoffs remain reachable after the island is finished. |
Note: Dimensions, clearances, ventilation openings, and connection requirements vary by grill model and installation. Verify the current manufacturer instructions and local building and fire-safety requirements before construction.
A built-in barbecue stays outdoors through heat, rain, and grease, so its materials matter as much as its cooking power. Look for corrosion-resistant stainless steel in the firebox, burners, and fasteners. The finish alone can be misleading; inspect the interior, where moisture and food residue collect. Check seams and corners for clean welds and sturdy construction. Small details count.
Thicker metal often holds heat more steadily, but it can also cost more and take longer to warm. There is no perfect choice for every patio. In coastal areas, salt air can speed corrosion, even on stainless steel, so regular cleaning still matters. A removable grease tray should slide out easily and leave room for safe disposal. If it feels flimsy in the store, it may be worse after months of use.
Match essential features to how you actually cook. Multiple burners allow direct and indirect heat, while a dependable ignition system saves fumbling near hot surfaces. Check that controls are easy to reach and marked clearly. Measure the cutout, not just the grill, and confirm the cabinet allows ventilation and service access. That part is easy to overlook. I would trade a flashy extra for a lid that closes evenly and a grease tray I can clean without tools.
Compare the approximate thermal conductivity of common grill construction materials at room temperature.
What this means: Higher thermal conductivity means heat moves through a material more readily; it does not indicate corrosion resistance or overall grill quality. For an outdoor kitchen, also consider stainless steel grade, burner and cooking-grate construction, heat distribution, and weather protection. Values are approximate and vary by alloy.
A built-in BBQ costs more than its cooking unit. Set a total budget that includes the grill, countertop cutout, fuel connection, and professional installation. Delivery, weather protection, and a suitable ventilation setup can add expense. Small costs add up. Leave a modest reserve for changes after the installer checks the space; measurements on a plan do not always match the finished kitchen.
Safety features deserve as much attention as price. Check that the appliance is certified for outdoor use in your region, and follow its installation instructions. Confirm required clearances from walls, eaves, and combustible cabinets before finalizing the layout. Fuel connections and electrical work should be handled by qualified professionals. I may be cautious here, but a tight corner can become a costly mistake.
Maintenance needs vary with climate and how often you cook. Look for removable grease trays and accessible burners, then check whether replacement parts are readily available. After cooking, let surfaces cool before cleaning them with products suited to their material. In coastal areas, salt air can speed corrosion, so rinse and dry exposed surfaces regularly. A fitted cover helps, but trapped moisture can still cause problems; lift it occasionally and inspect underneath.
Sign up today to keep up with the newest information from one of the Southeast’s leading suppliers of fluid handling equipment!